|
EZ Emergency Well Pump Kits. |
|
|
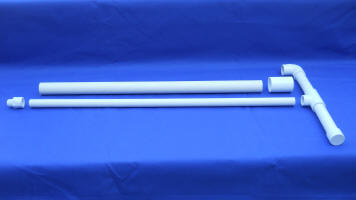
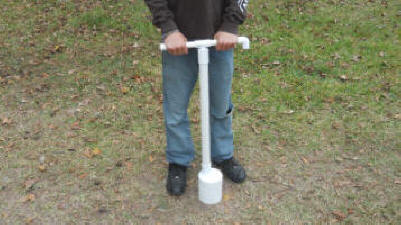
Above Ground Detachable Pump Handle |
|
|
Cut A Piece Of 1" Thin Wall Pipe That You Purchase, 20" to 23" Long...... The 1/2" Piece Of Pumping Pipe That You Get With Your Kit Is For Above Ground...The T Handle Connects To This...The 1" Thin Wall Piece Is The Above Ground Guide Section. |
|
| The 1/2" Pumping Pipe Length/Height Above Is Not Written In Stone...Just Cut The 1/2" Pipe To Your Pumping Comfort For Your Height...No Need To Bend Over While Pumping. Cut The 1/2" Pumping Pipe About 1" Longer Than The 1" Thin Wall. If the 1/2" Pumping Pipe that you get with your kit isn't long/tall enough for comfortable pumping, simply replace it with a longer piece of 1/2" that you purchase. Then cut the 1" Thin Wall Guide Pipe Accordingly. | |
|
|
|
|
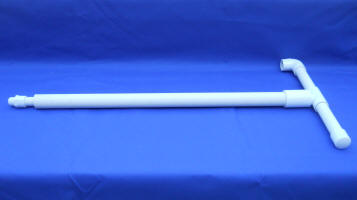
Detachable Pump Handle Layout - No Need To Cement Anything On The 1" Pipe. Just Slip On The Coupler Fitting At The Top Of The 1" Thin Wall. |
|
|
Do Cement the 1/2" Male Fitting On The 1/2" Pump Pipe Bottom, Then Insert The 1/2" Pumping Pipe Into The Bottom Of The 1" Thin Wall Pipe, Through The Coupler ...Now Cement And Attach The T Handle To The 1/2" Pumping Pipe LAST... |
|
|
|
|
|
|
|
|
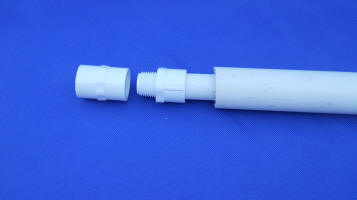
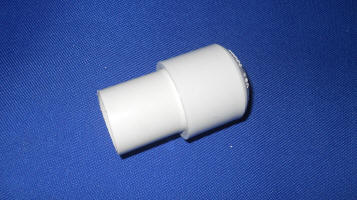
This Is The Bottom Part Of The Detachable Pump Handle That Will Attach To The Connection At The Well Cap |
|
| NOTE: The Separate Female Fitting To The Left Is Cemented To The Last 1/2" Pipe At The Well Cap...When In Use, You'll (Loosely HAND TIGHTEN ONLY) Screw These 2 Together When Attaching The Handle On To Use Your Pump...DO NOT Cement The 1" Thin Wall Pump Handle Section To Last The 1' Coupler At The Well Cap...You'll Want To Remove It When Not In Use | |
|
|
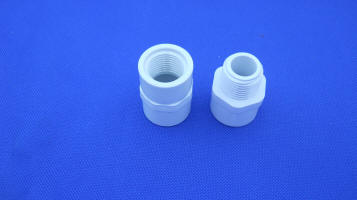 |
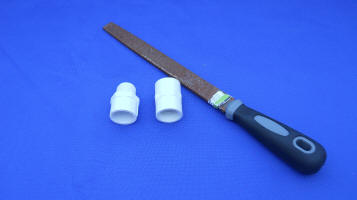
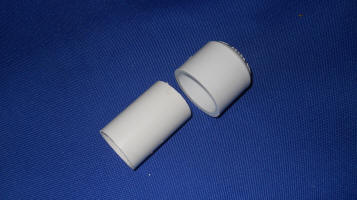
| Left - 1/2"
Slip to Male Threaded Right - 1/2" Slip To Female Threaded... |
Both Fittings Have Ridges Like The Above, You Must File Them Down A Little So They Will Slide Freely Inside The 1' Thin Wall Of The Detachable Section. |
|
|
|
|
Insert & Cement A Short 2" Piece Of 1" Thin Wall Into The Top Cap So It Will Fit Into The 1" Coupler On The Well Cap. |
|
|
|
|
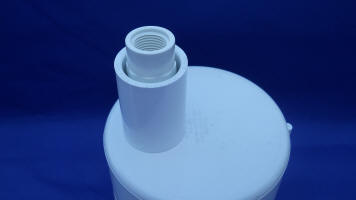
| Pump Installed - Showing Last 1" Coupler On Top Of PVC Well Cap (The Support Section) That Holds The Hand Pump Up, With 1/2" Pumping Pipe Sticking Out...See The Female Threaded Fitting In Center On The 1/2" Pumping Pipe. Your Detachable Pump Handle Section Connects Here...DO NOT CEMENT The 1" Thin Wall Casing Pipe To The Coupler...Just Slip It In So It Can Be Removed When Not In Use. |
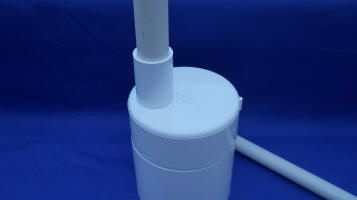
Covered Well Hand Pump |
|
|
|
|
Simply Screw On the 1/2" Pumping Handle ( Hand Tight) And Slide The 1" Guide Pipe Into the Coupler As Needed... |
|
| Note: When Inserting The 1" Guide Pipe Into The Coupler At The Top Of Your Well Cap, Don't Push It In Too Tight...It Might Be A Little Hard To Remove It For Storage. | |
|
|
|